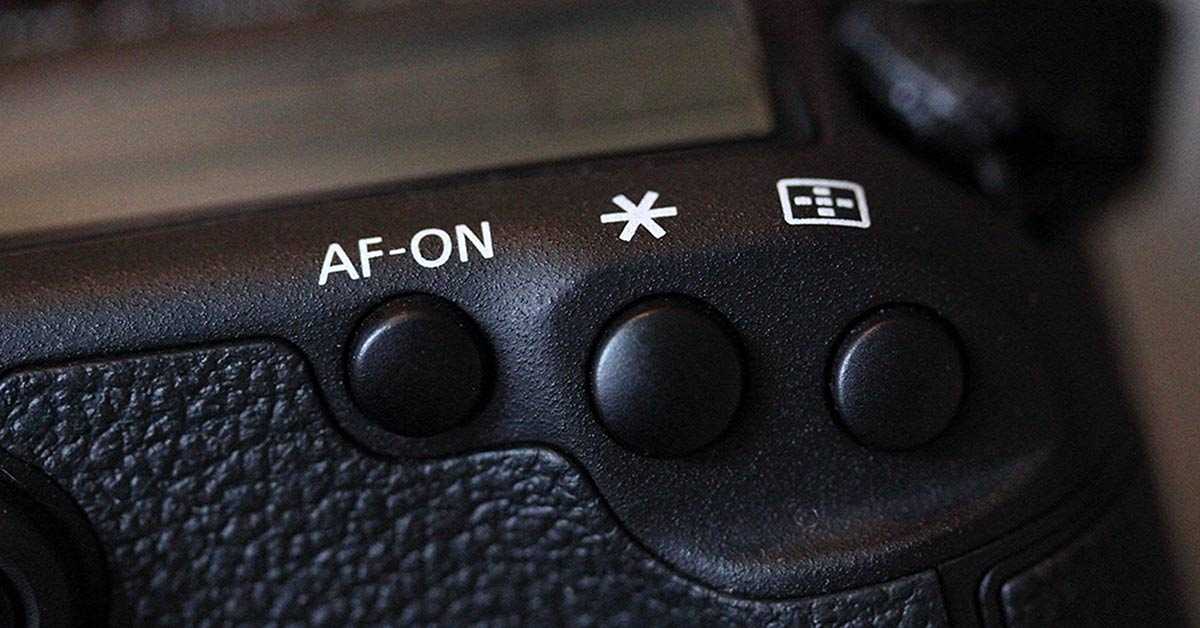
Back Button Focus
Over the years I have used many photographic techniques that have helped me to improve my wildlife and nature photography. One of these great techniques is the use of ‘back button focus’ while using my DSLR cameras.
In this post, I want to go through and explain the process of setting up ‘back button’ focus on a camera (in this case a Canon) and tell you why I like to use back button focus in my wildlife photography.
Back button focusing is not a new technique, but it has helped me and many other wildlife and sports photographers improve their photography by shooting sharper images more consistently.
Perhaps as a new wildlife photographer or someone who has not tried using ‘back button’ focus in your wildlife photography, it maybe a technique worth exploring. I urge you to give it a try for yourself and see if it will help you improve your images it certainly did for me.
What is Back Button Focus on a Camera?
Back button focusing is a different type of focusing technique and it is much more efficient than front button focusing, certainly for wildlife and sports photographers.
In a nutshell if you use the ‘back button focus’ technique you are separating or decoupling the ‘focusing’ system from the shutter button or shutter release button on the front of your DSLR camera.
Therefore by assigning the ‘focusing’ to another button on your camera, (we will go through this shortly) the ‘autofocus’ system is only activated when that assigned ‘button’ is pressed and held down on the back of the camera.
This involves pushing the ‘AF on’ button on the back of your Canon camera, so you’re focusing with a ‘back button’ or with your thumb. So using this method, versus the traditional way of focusing, which is with your index finger on the shutter release button at the front of the camera is an alternative way of focusing as we shall see.
As we all know the default behaviour for cameras is for the auto focus or AF system to begin focusing when you ‘half’ press the shutter button. However, with back button AF this traditional method of focusing is disabled, and the shutter button only takes the photo and starts the ‘metering’ of the scene.
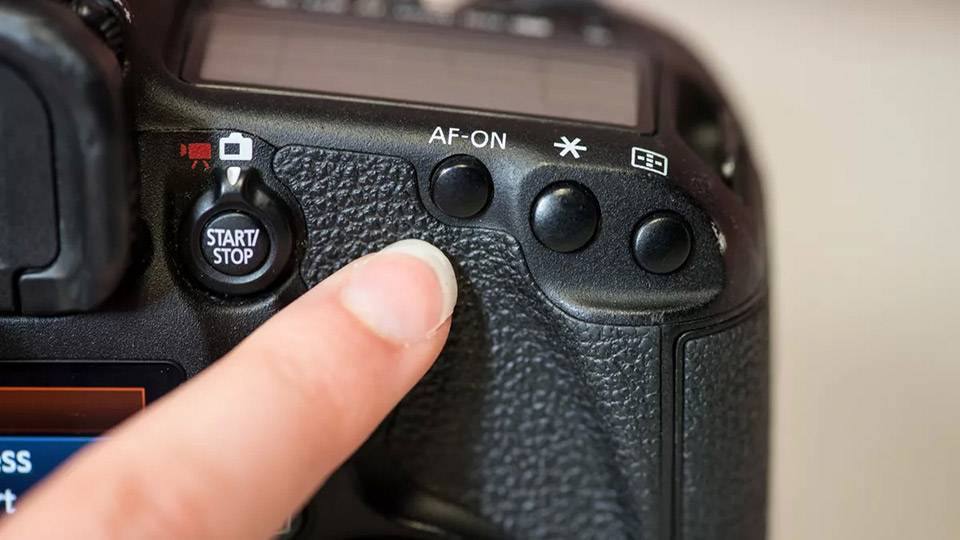
What Cameras Can be Set up For Back Button Focus?
As a Canon user I know this back button focus technique can be applied to the Canon 7D Mark II, the Canon 5D Mark lll & IV and the 1D X Mark II & lll also the newer 5DS-R cameras. It will almost certainly work with future versions of these cameras going forward. It can also be set on other popular brands like the Nikon D500 & D850 and other higher-end DSLR’s made by other reputable manufactures. Just consult your respective user manuals.
What is the Benefit of Back Button Focusing?
The main benefit of back button focus is the ability to quickly focus and ‘recompose’ your shot in-camera without the camera refocusing each time you press the shutter release button. Let me go through this scenario and explain why back-button focusing is more efficient.
The Lion Scenario
Let us say I am photographing a beautiful male lion walking around in front of me. I am looking through the camera’s viewfinder and I am focusing in the ‘traditional’ way with my finger on the front shutter button as the lion is moving around. I am focusing, and I am taking pictures continually using the centre focusing point.
Now let us say that the lion stops moving, now this beautiful male lion is standing there majestically and is looking around surveying his territory.
Now I am thinking this is great, I have got an opportunity to take a great portrait shot of this male lion showing his head and beautiful full mane only.
Traditionally then I would be focusing on him as he is moving around with my camera set in ‘continuous AI servo’ mode (Canon users) and I would be tracking him using the centre focus point set in my camera. However, if I wanted to focus on the lion, once he has stopped, lets say for that portrait head shot, I would have to ‘recompose’ the shot, put him on say the left-hand side of the frame looking into some negative space.
Then, when I went to retake my photo the camera would ‘re-focus’ on the background of the scene, not the lions head due to the location of my focusing point/s (centre) this is a real pain especially for wildlife photographers.
What to do?
Traditionally in this situation I would need to switch the camera back to ‘single servo autofocus’ so I could ‘focus hold’ the, then recompose the shot on the lions head/eye with my centre focus point.
This method of ‘holding focus’ really does not help wildlife photographer with huge potential to miss shots in those valuable seconds while switching from one focus mode to another and or getting ‘out of focus’ shots. So enter ‘back button focus’.
By using back button focus, don’t forget we have now decoupled focusing from the shutter button, the camera can always be left in AI servo (Canon Users) so you do not have to switch focusing modes. Let’s take a look.
The Lion Scenario Take 2
The same lion scenario again works like this now. Still in A1 Servo , the lion is walking around in front of me and I am tracking and taking pictures but now instead of using the shutter release button to track, focus and take the picture, I’m continually tracking and focusing with my thumb (using the back button focus method), which is pressed down using the AF-On button (which I assigned in the menu system) on the back of the camera.
This allows me to take a picture at any time by simply depressing the shutter release button to start the scenes metering and take the shot, while all the time ensuring the subject is tracked and is in sharp focus via the back button focus AF-On button.
Now the lion stops, so what do? I take the camera and I focus on the lions face/eye as before, all the while still depressing the AF-On button on the back of my camera with my thumb to obtain sharp focus.
Once focus is obtained on the point I want, I can simply let go with my thumb. Now when I go to take my picture after I have recomposed the shot (the lions head on the left-hand side), the camera does not refocus the shot. The ‘focusing’ function has been taken away or decoupled from the shutter release button.
Fantastic, so now every time I take another picture I can place the lion on the left side, I can put the lion in the middle or on the right side or anywhere in the frame and the camera ‘maintains focus’ at that original distance. Focus will be maintained until either the lion or I move position, then you will need to refocus as before.
As explained earlier this allows for the camera focusing mode to stay in A1 servo mode and the chances of blurry shots and or missed action is minimalised.
How do I Set Back Button Focus?
We have looked at how back button focus can assist you in your wildlife photography, by recomposing an image while maintaining sharp focus. Now I will explain how you can set you camera (Canon’s) up to assign the AF-On button on your camera to achieve this.
As I said I am using Canon camera’s, in this case a 7D MKll but a similar approach can be used if you are using any other camera manufacturer using the higher end DSLR models.
Assuming you have set your camera to A1 servo focusing mode, then lets proceed to this step.
- Go to the main menu system, open and navigate to the Orange set of tabs and find the Custom function (C.Fn3) one called “Operation”.Using your large wheel on the back of your camera scroll down to the bottom where you will find the menu item called ‘Custom Controls’ which is where we will make the adjustments. Once there press the ‘Set’ button.
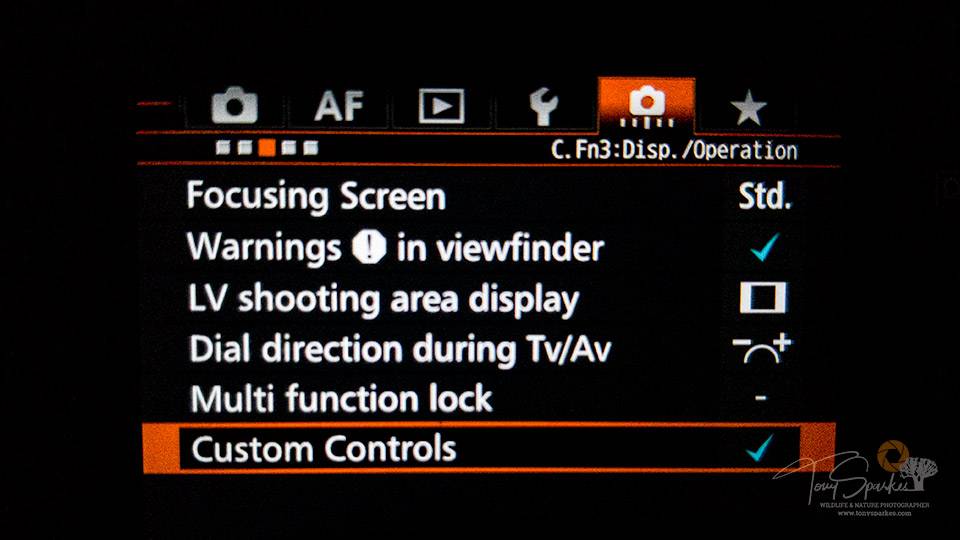
- The very first item in the custom controls button list is the shutter button, the default setting if you have not changed it previously. This mode begins both AF and metering with a half press of the shutter button. By scrolling down further in this menu on the back of your camera, you can change this ‘default’ setting so that the half-press of the shutter only engages the metering, and NOT the AF.
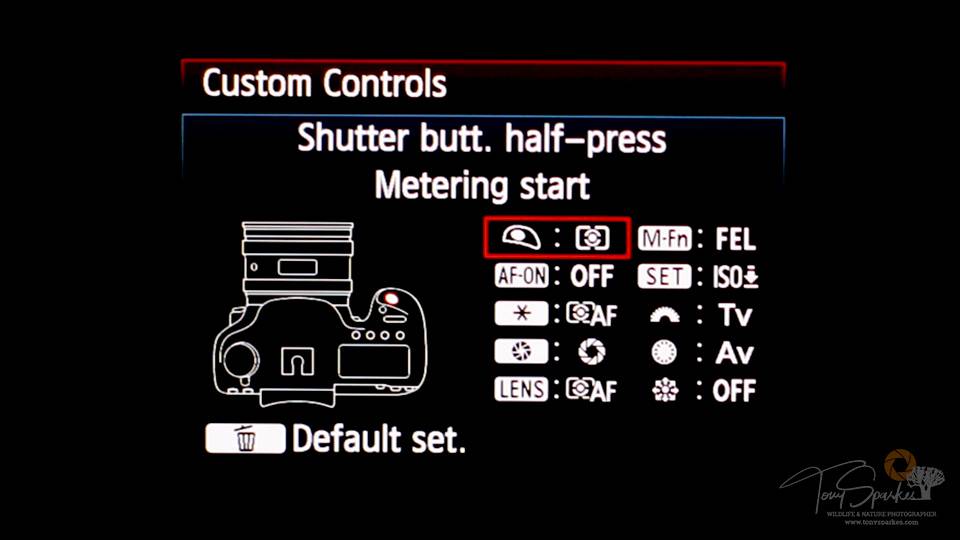
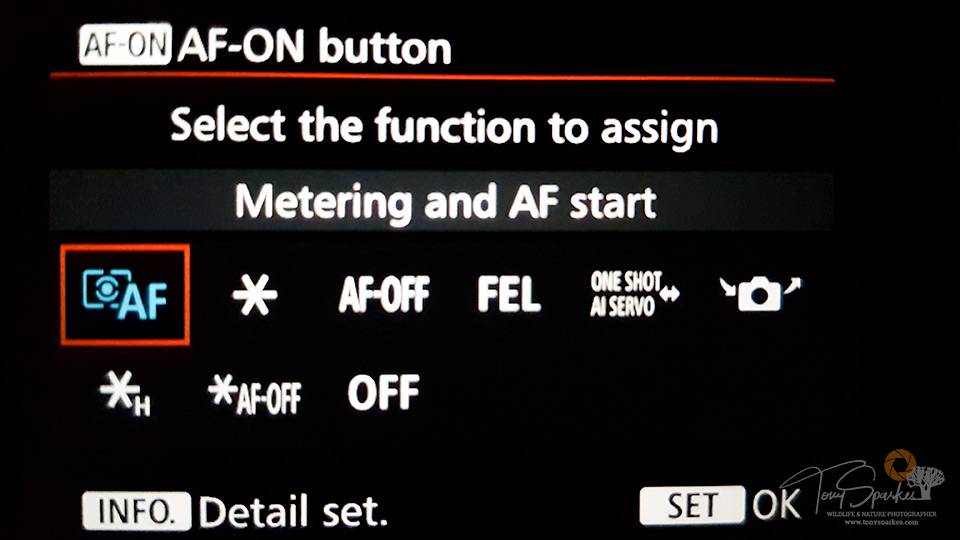
Scroll down the custom control menu until you get to the AF-On button (second on the list) press set again. You will see another screen appear (AF-ON button Screen). Follow a similar procedure here, scroll to the function of the ‘AF-On button to Metering and AF Start’ as shown below, then press set (OK)
You now have Back Button AF set up using the AF-On button to focus and not the shutter release button as before. Please test this to make sure you selected the right settings as described above.
Make sure your lens’ autofocus is on and half-press the shutter button on the camera. If you have done things correctly, the camera will not change the focus of the lens.
Now press the ‘AF-On button’ on the back of the camera, and you should see/hear the focus change. If this isn’t happening, repeat the previous steps and make sure you follow the on-screen instruction for saving the settings.
Note: If you do not press “Set”, and simply press the menu button to go back in the menu system, the settings will not have been saved. This is the most common issue people have when trying to get this set up correctly.
Conclusion
I am confident that by using the ‘back button focusing’ method you will improve your wildlife photography, not only by capturing images you may have missed in the past while switching between modes. You will also improve the number of sharp images you take going forward.
I expect it will feel strange at first having to ‘focus’ with your thumb and not your forefinger but persevere and you will surely be rewarded. What have you got to lose?
- Back Button Focus - June 30, 2020

