Camera Settings For Wildlife Photography
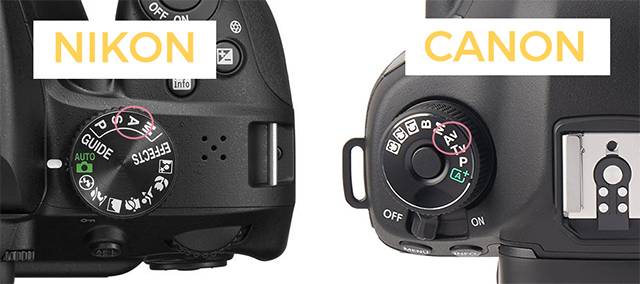
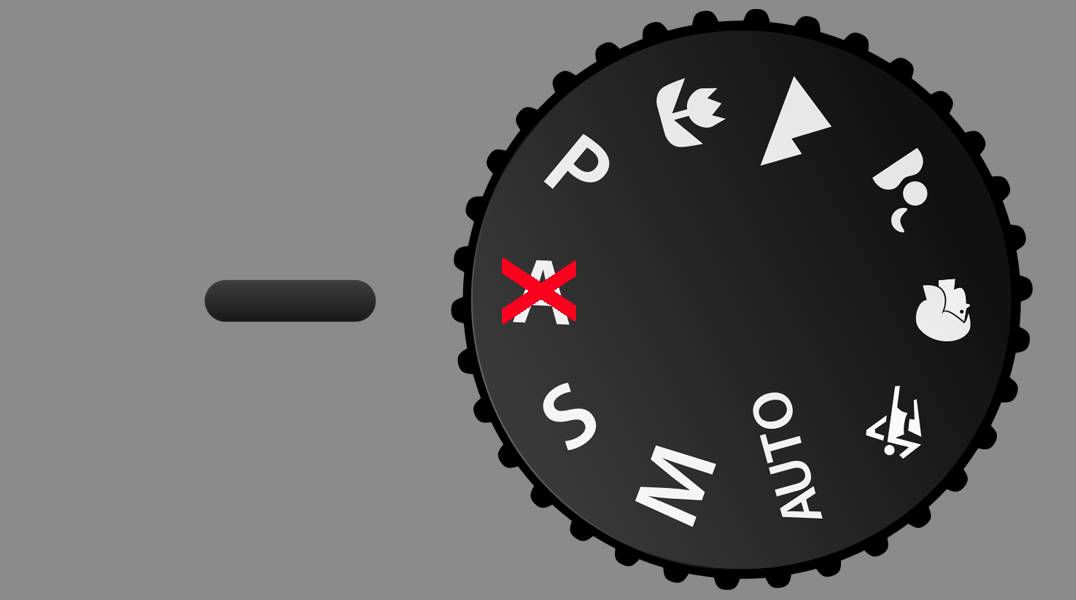
Over the years I think like many wildlife photographers, I use to religiously go to the semi-automatic camera setting ‘aperture priority’ or AV ‘aperture value’ for Canon DSLR users or A ‘aperture’ for Nikon DSLR users.
Low Light Wildlife Photography – Don’t use Aperture Priority!
By adjusting the camera’s aperture setting, (which invariable needs to be ‘wide’ open anyway in low light) using the low F numbers like F2.8, F4, or F5.6 apertures, I achieved what I thought was my perfect photos.
This is mainly due to the fact that as wildlife photographers we want to gain that creamy bokeh, that blurry background. The bokeh was ‘all’ important and really mattered to me, even sacrificing some sharpness. Isolate my subject from the background by adjusting the ‘aperture’ and I was all set, all was well, or so I thought.
However, I have come to learn over the years that this is not a the best setting for wildlife photography, I’m going to tell you why and I am I’m also going to give you a breakdown of some good settings for your camera.

Wildlife Photography Tips For Beginners
So, let’s see why using aperture priority is perhaps not such a great idea for wildlife photography and how using shutter speed priority will help in getting more usable shots.
Aperture Priority Mode
I think it really comes down to the reason I mentioned above as to why so may of us use aperture priority. Of course many wildlife photographers use it because they want to make sure there lens is ‘wide open’, so they get that nice creamy bokeh effect but also to try and get as much ‘light’ as possible on the camera sensor in those low light situations.
Shutter Speeds
In wildlife photography you’re usually battling with low light levels anyway as I said, so you should know your shutter speeds are never going to be that low to cope with these low light levels (ie..open longer, thus slower to let in more light). It’s not like you’re shooting an F1.4 lens in bright light.
So practically speaking whatever camera settings for wildlife photography you have set, your camera irrespective of the ‘aperture priority’ or ‘shutter speed priority’ setting will normally need to ensure the lens is going to be wide open anyway in a given situation.
Therefore, if you use aperture priority and set the lens wide open and then go out and shoot, you’re essentially just using auto mode and you’re leaving everything else ie.. shutter speed up to the camera because the lens would have been wide open anyway in ‘auto’ mode.
Whats More Important?
What I would advise to be much more important to wildlife photographers is ‘shutter speed’. I think you should be using shutter priority or manual mode not aperture priority in these low light situations.
Shutter Priority Mode
Having the ability to adjust your shutter speed depending on your situation is so much more important than being able to adjust the aperture. For example, if you want to be able to drop your shutter speed down to the minimum speed that you can handle to get the most amount of light onto your sensor and give you the cleanest image, by reducing your ISO setting, then shutter priority is required.
While being conscious of the fact you also need to be able to adjust the shutter speed to the point where you’re not getting any motion blur, but you’re still at the lowest shutter speed you can possibly be. Well the only way to do that is to use shutter priority or manual mode.
Moving Subjects
Likewise, another example, if you’re shooting something that is moving, like birds in flight, running or animals in motion, your shutter speed will need to be much higher, particularly if you want to freeze the action. However, you still want it to be as low as possible while not getting that ‘motion blur ‘effect if needed. Again, to do this you need to be adjusting your shutter speed. Therefore, if you have your camera set to ‘aperture’ priority you have no control over your shutter speed and the outcome of your shot more often than not is not what you envisaged.
Control Shutter Speed not the Aperture
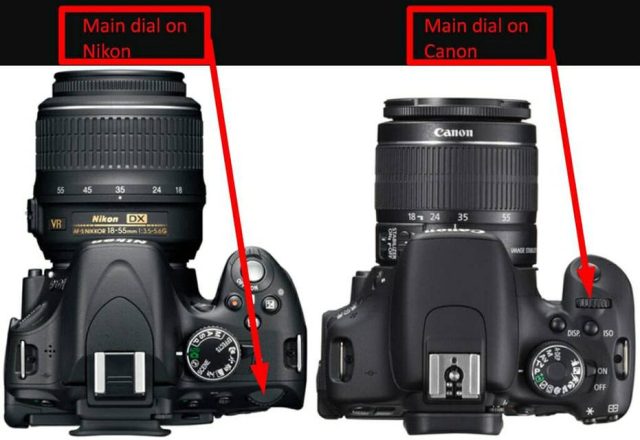
To be able to select the ‘shutter speed’ you want to use comes down to what camera make you have. Please refer to your own camera manual for settings to controls shutter speeds (Shutter Priority Mode). My Canon’s for arguments sake, control shutter speed (when set in Tv or Time Value shutter priority mode) through a dial set on the top of the camera on the right-hand side, yours maybe different.
Shooting in low light conditions, your camera will more than likely set your camera’s aperture wide open, when in shutter priority mode. If you’re camera ever decides to change the ‘aperture’ automatically when in shutter priority mode to anything other than wide open, (Lowest F number your lens will allow) then it’s going to be for a good reason, probably because it’s got ridiculously bright, a scenario which is not ideal for wildlife photography anyway.
ISO for wildlife photography
Therefore, its better to shoot in ‘shutter priority’ and let the camera decide on your aperture setting. Set your ISO settings between 100 -1000 (see general settings values below) and check exposure in your histogram (See Check Your Histogram) below and adjust your shutter speed up or down accordingly and or adjust the ISO.
For a better understanding of the relationships between Aperture/Shutter Speed/ISO you should refer to my blog post Exposure Triangle Explained.

Manual Mode – Auto ISO is Better
If you have a higher end camera body where you can shoot ‘RAW’ images (not Jpegs) and you can easily access and set both the ‘aperture’ and ‘shutter speed’ independently like I can on my Canons, I would suggest trying manual mode (M) on your camera dial. This is another of the camera settings for wildlife photography that provides great flexibility to the user.
Even More Control
This means that you can now set the front dial (Canon’s) which will control the ‘aperture’ and your rear dial (Canon’s) that will control your shutter speed. To get this to work perfectly though we need to however involve one more step, we need to set our camera’s ISO (sensors sensitivity to light) to ‘auto’. This combination of settings now really gives you the best of both worlds. Where you can set both aperture and shutter speed and the camera will set the ISO automatically. There are several YouTube videos which discuss the merits of M mode and auto ISO for various camera’s. You can find them here
Aperture Priority – Manual Mode
In manual mode auto ISO we can now control our ‘aperture’ if you ever need to, but most of the time it’s going to be set wide open as mentioned above, but maybe you need a bit more depth of field in certain situations? Now you can control the ‘aperture’ by just dialling it down a stop (Larger F Number) to get a bit more overall sharpness or whatever the reason you may need.
Generally, though as I said, your lens is going to be wide open most of the time, which is why I think it’s good to prioritise shutter priority over aperture priority.
Shutter Priority – Manual Mode
In manual mode auto ISO we can now control our shutter speed, so depending on whether you’re shooting stationary animals (slower shutter speed) or moving animals/ birds in flight (faster shutter speed) you can easily adjust your shutter speed accordingly and let the camera set the ISO automatically to balance the other two settings you have made, aperture and shutter speed to give you a decent exposure.
Check Your Histogram
When using the ‘manual mode’ setting above and adjusting you shutter speed and or aperture (if needs be) you ISO will now adjust ‘automatically’ to give you a well exposed picture. The camera normally does a pretty good job but always check your camera’s ‘histogram’.
Your cameras histogram shows you a graphical representation of the tonal values of your image, ie.. if your image is over exposed, then your histogram graph will be too much to the right (blown out highlights), or under exposed your graph will be to much to the left (No detail in the shadows). Just make any small ‘brightness’ adjustments by altering your ‘shutter speed’ up or down (down – slower for brighter images or up – faster for darker images) but be careful to avoid any ‘motion blur’ in your images.
Camera Settings
Here are some general camera settings to try and aim for while shooting wildlife in this semi-automatic modes.
General Values to Try and Aim For
- Try and keep your ISO as low as possible but with today’s modern cameras acceptable images can be taken in low light with ISO settings between 100 – 1600. However, in early morning or late afternoon light ISO settings between 400 – 1000 are the norm.
- Stationary animals – With your lens mounted on a tripod or supported by a bean bag one should at least aim for shutter speed of 1/ over your focal length of your lens. ie.. If your lens focal length is 500 mm then your shutter speed should be at least 1/500th sec or a 200 mm lens 1/250th
- Moving animals and or birds in flight to freeze any action, shutter speeds of 1/1000th sec and faster will be required.
- The aperture will depend on the lens you have, but a good general aperture to try and achieve is F5.6 which gives a reasonable combination of both sharpness and depth of field ability (Bokeh) at low light levels. Lenses with lower apertures capabilities F4, F2.8 or fast glass as they call it in the industry are very expensive.
Conclusion
As wildlife photographers using shutter priority over aperture priority in the field has a very strong argument as laid out above. If you follow this guide you can be sure that this will offer some of the best camera settings for wildlife photography, certainly as a beginner.
Because in the genre of ‘wildlife photography’ we as photographers have no control over the animals we are photographing and or the lighting conditions under which we are shooting. Therefore, using shutter priority provides the photographer with a good degree of control to ensure you get a good chance for descent images.
However, using manual mode and auto ISO as described previously, gives the photographer the best possible chance of taking a ‘keeper’ in any of the semi-automatic modes. Obviously for full ‘creativity’ one should adapt to shooting fully manual (M). This will be the subject for another post.
I hope the above will give you some ideas of where to start on your wildlife photography set up and your journey of discovery in our chosen genre of wildlife photography.
- African Wildlife Photography Tips - February 23, 2020
- Low Light Wildlife Photography - November 26, 2019
- Bonamanzi Game Reserve - November 21, 2019

